Merchant-Locked Cards
Merchant Cards lock to the first merchant you make a transaction at.
Single-Use Cards
Single-Use Cards close after the first transaction.
Category Cards
Category-Locked Cards come locked to a predefined merchant category.
Everywhere Cards
Everywhere Cards can be used in-person with mobile wallet compatibility, and don’t lock to a single merchant.
How To Remove Subscriptions on an iPhone or iPad—A Comprehensive Guide
The subscription pricing model has become widespread. According to Statista, the revenue of subscription-based digital media alone is expected to rise by over 13.5% by 2025, generating over $1.26 trillion in recurring payments.
In most cases, signing up for a subscription service is a breeze, whereas canceling can sometimes be challenging due to the companies’ continuous efforts to retain you as a customer and maintain an edge within the competitive landscape.
To help you navigate the cancellation process with more ease, this article will explain how to remove subscriptions on an iPhone or iPad. You’ll also learn how to limit unexpected charges from subscription-based merchants.
Note that the information in this article is valid as of November 2023. For updates, refer to Apple’s website or connect with their customer support.

How To Stop a Subscription on an iPhone or iPad—A Step-by-Step Guide
For starters, you should know that deleting the subscription service’s app from your phone won’t remove the subscription and prevent automatic payments. If you want to stop a subscription on an iPhone or iPad, you should follow the steps below:
- Go to Settings.
- Tap your name, then Subscriptions.
- Find the subscription you’re looking to cancel and tap it.
- Tap the Cancel Subscription option. You might need to scroll down to locate it. If the button is unavailable, that means the subscription has already been removed.
It is also important to know that the subscription cancellation process may differ in some regions and countries.
You should cancel the subscription at least 24 hours before the end of the free trial or billing period. Otherwise, your request may not be processed in time, and you may have to pay for another month or year of services.
Within the same Subscriptions settings, you can also:
- Modify subscriptions, i.e., switch to a different plan or billing frequency
- Resubscribe to inactive subscriptions
- Share eligible subscriptions with others in your Family Sharing group
What To Do if You Can’t Find the Subscription
In case you can’t find the subscription you want to cancel in the Subscriptions section, you should try to find the receipt. The following directions will help you do so:
- Go to your email app.
- Type “receipt from Apple” in the search bar.
- Check the receipt of the subscription in question and see which Apple ID was used:
- If the receipt displays a family member’s Apple ID, you’ll have to ask that particular person to cancel the subscription.
- If the receipt displays your other Apple ID, log in with that one and start all over.
- In case you can’t find the Apple receipt, that might mean you’ve purchased the subscription from another seller. You should refer to your bank or credit card statements to see which seller billed you for the subscription and follow their cancellation procedure.
How To Remove an Apple Subscription on Other Devices
To remove Apple subscriptions using a computer running Mac or Windows, take the steps listed in the table below:

Can You Remove Expired Subscriptions From an iPhone or iPad?
No—you can’t remove inactive subscriptions from your iOS device. They will disappear automatically one year after their expiration date. If you’re worried about accidentally reactivating an old subscription, you can hide it from your purchase history like so:
- Go to the App Store.
- Tap your account icon at the top of the screen.
- Tap Purchased or My Purchases if you use Family Sharing.
- Find the purchase you want to hide, swipe left on it, and then tap the Hide option.
- Tap Done.
If you want to reactivate the subscription, you should unhide it first by doing the following:
- Launch the App Store and go to your account again.
- Scroll down and select Hidden Purchases.
- Tap Unhide next to the app you want to reactivate.
- Tap the Done option next to Account Settings to go back to the App Store.
Here’s what the process looks like on a Mac computer:
Potential Issues When Canceling Apple Subscriptions
If you’re having difficulty removing a subscription on an iPhone or iPad, you should check whether:
- The subscription has expired or has already been canceled
- You’re using a family member’s subscription
- You’ve subscribed via another source, such as the company’s website
If the above possibilities don’t apply to you, the problem may lie in a software glitch or another technical problem. In that case, it’s best to contact Apple’s customer support. If you end up incurring charges because of the said problem, you may be able to request a refund on Apple’s Report a Problem page.
Although the cancellation process on Apple devices is straightforward, some direct-billed subscriptions can be particularly tough to cancel. From small and easy-to-miss cancellation links to long and obtrusive sales pitches—the methods companies use to prevent you from unsubscribing are various. Some may require you to wait on a phone hold with customer support for hours trying to cancel, while others don’t even disclose any contact information. After all the confusion and frustration, you may end up missing a crucial cancellation step and paying for the service again.

The Federal Trade Commission (FTC) ponders implementing a “click to cancel” rule that would obligate companies to simplify their cancellation funnels. Since there may still be a long way to go before this rule is implemented, you must employ another solution to protect your funds from sneaky merchants, such as virtual cards.
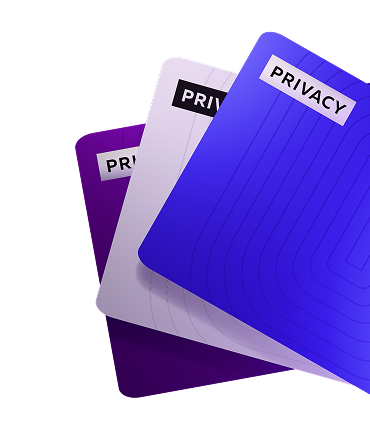
Virtual Cards to the Rescue
Virtual cards create an integral layer of security around your transactions by replacing your financial information with random, unique numbers at checkout. These cards are connected to a real funding source but shield your payment details to protect them in case of cyber attacks.
While some users prefer virtual cards for their safety aspect, these cards can do much more. When you opt for a feature-rich virtual card service such as Privacy, you get the ability to fine-tune your cards’ settings and protect against subscription services charging you more than you’ve agreed to.
Take Charge of Your Spending With Privacy Virtual Cards
Use Privacy Virtual Cards to pay for your subscriptions and enjoy unmatched levels of security and control. With BBB® accreditation and various protective measures, including robust transaction monitoring and two-factor authentication, you can rest assured your data and finances are safe with Privacy.
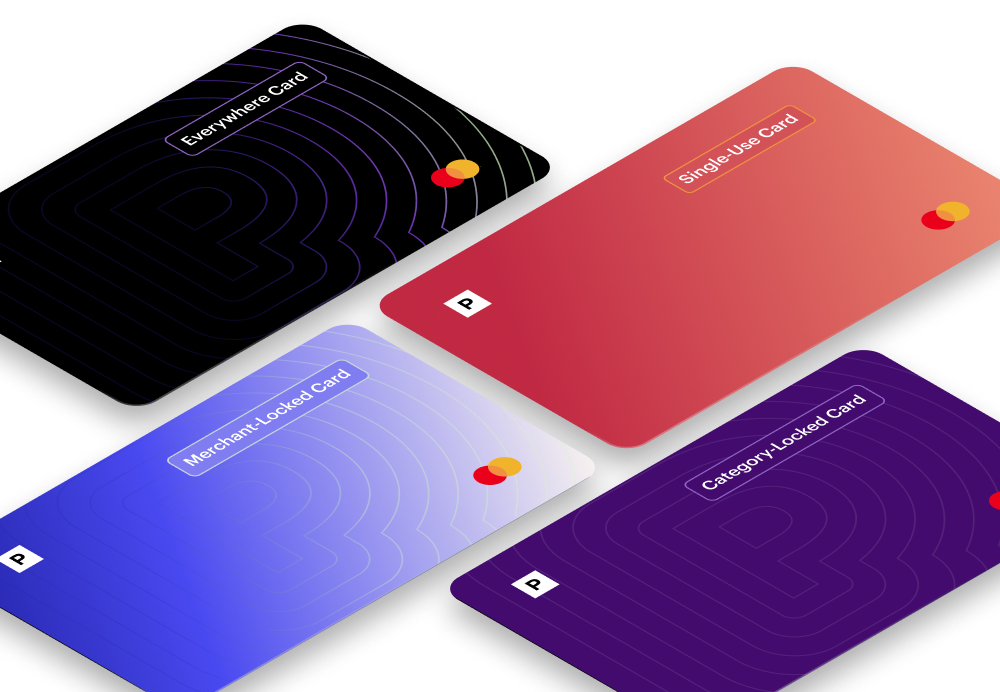
You can generate three kinds of Privacy Cards:
- Single-Use Card—This card is valid for only one transaction and closes shortly after the first purchase is completed. A Single-Use Card is especially useful for shopping on new websites whose reliability you’re not sure of.
- Merchant-Locked Card—This card can be used with only one merchant, which makes it ideal for websites you transact with often and subscription services, including favorites like Audible, Canva, and Chegg.
- Category-Locked Card—This card can be used with multiple merchants, but only if they belong to the same category. This makes it useful for organizing your budget and giving family members allowances.
With Privacy Cards, you can also set spending limits and pause or close cards quickly without affecting the linked funding source. These features make them an excellent choice for dealing with subscriptions. Privacy will decline all transaction attempts on paused or closed cards as well as charges that exceed the preset limit, allowing you to complete the company’s cancellation procedure without anxiety about unexpected charges.
Privacy—Additional Perks and Setup Process
When you sign up for Privacy, you also get access to its:
- Browser extension—Compatible with Edge, Chrome, Firefox, and Safari, the browser extension auto-populates card details at checkout, sparing you from having to look for your wallet or memorize card numbers. The Safari iOS extension enables fast and seamless checkouts on your iPhone and iPad.
- Mobile app—Privacy has an app for iOS and Android that lets you create and manage virtual cards regardless of your location.
The Personal plan, which is free for domestic purchases, includes 12 new virtual cards a month, which can be Single-Use or Merchant-Locked, and all the features mentioned above. Privacy has three more monthly plans—Plus ($5/month), Pro ($10/month), and Premium ($25/month). They come with additional benefits, such as up to 60 virtual cards a month, Category Cards, fee-free international transactions, Shared Cards, Card Notes, and Priority support with Live Chat.
Privacy’s simple setup process only requires you to:
- Create an account
- Fill out the information necessary for identity verification purposes
- Link your bank account or debit card
- Request virtual cards
You can use Privacy Virtual Cards at most merchants and websites that accept U.S. Visa® and Mastercard® payments, including streaming services like NFL Plus, HBO Max, or Paramount Plus, and your everyday go-to’s like DashPass, Walmart, or Peloton.