Privacy Virtual Cards
Spending Limits

Set a spending limit and Privacy will decline any transactions that go over the limit

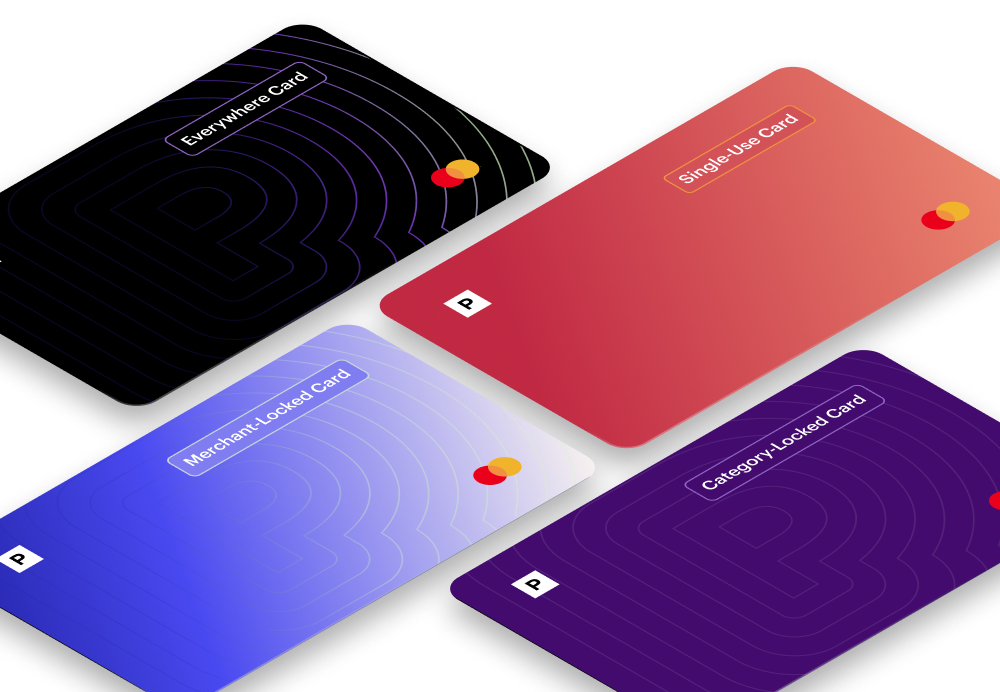
Merchant-Locked Cards

Lock Privacy Cards to the first merchant they’re used at to prevent misuse if stolen

Single-Use Cards

Create Privacy Cards that close automatically after the first purchase is made on them

Pause/Close Cards

Pause or close your Privacy Cards at any time to block future transaction attempts

How To Cancel Amazon Prime—A Practical Guide

Reviewed by
Jan 17, 2024
 • 
10
 Min Read
Manage Your Subscription Payments

Amazon Prime is a popular subscription service offered by the e-commerce giant Amazon. It provides over 200 million users with benefits such as free two-day shipping, access to music and video streaming services, exclusive deals and discounts, and unlimited photo storage. However, Amazon Prime may not meet the expectations of all users, leading to a desire to cancel the service.

If you no longer wish to use the services, this practical guide is for you. It will provide detailed step-by-step instructions on how to cancel Amazon Prime membership through the web and mobile app and tips to protect your funds from unauthorized subscription charges.

Note that the content in this guide is valid as of January 2025. Visit the official Amazon Prime website or contact customer support for the most recent and accurate information.

A photo of Amazon Prime Boxes against a blue background
Source: Pixabay

How To Cancel Amazon Prime Membership on Desktop and Mobile Devices

You can cancel Amazon Prime anytime, including during the free trial period, to avoid automatic renewal. The process of canceling the membership varies slightly depending on whether you’re using a desktop or mobile device. The following table details all the steps you must complete to cancel your Amazon Prime subscription on both devices:

On Desktop On Mobile Devices
  1. Log in to your Amazon account in your web browser.

  2. Hover your mouse over the Accounts & Lists in the top right corner of the page and click Prime Membership.

  3. Click Manage Membership in the top right corner of the screen.

  4. Click the End Membership button on the left side of the screen.

  5. Review how many days are left in your membership and click the yellow Continue to Cancel button on the bottom right.

  6. Click Cancel My Benefits on the next page. Amazon Prime will ask you to reconsider, but you should click on Continue to Cancel.

  7. Follow the on-screen prompts to complete the cancellation process.

  1. Open the Amazon app and tap on the profile icon in the bottom menu.

  2. Tap Your Account to access the account settings.

  3. Scroll down and tap Manage Prime Membership.

  4. Tap the Manage Membership drop-down menu and hit the Manage Membership button at the top of the page.

  5. Choose Manage Membership–Update, cancel, and more (it's the last option in that menu).

  6. Tap End Membership and scroll past the benefits to hit the Cancel My Benefits button.

  7. Tap the yellow Continue to Cancel button.

  8. Confirm your decision to cancel by tapping the End on (date) button.


After you complete the steps described above, you will receive an email confirming the cancellation of your subscription. Note that if you’re canceling your Amazon Prime membership, it doesn’t end immediately—it will officially close when your current paid period expires. 

Amazon Prime Pause vs. Cancel Membership—What’s the Difference?

If you need to take a break from your Prime membership but don't want to cancel it altogether, you can pause it for a certain period. When you pause your Prime membership, you temporarily lose access to the Prime benefits. Amazon also won't charge you for the paused membership period, and you can resume your Prime membership anytime and at the current subscription rate.

How To Cancel Amazon Business Prime

To cancel your Amazon Business Prime membership, you should follow the steps below:

  1. Log in to your Amazon Business account.
  2. Navigate to Your Account.
  3. Select the Business Prime icon.
  4. Select Cancel to end your Business Prime membership.

If eligible, you may receive a partial refund after canceling your Amazon Business Prime account. It will be automatically calculated based on the remaining days of your subscription and shown to you after you end your Business Prime membership.

How To Cancel Paramount Plus on Amazon Prime

If you want to cancel a Paramount Plus subscription you have through Amazon Prime, you should follow the steps for canceling Prime Video add-on subscriptions:

  1. Log in to your Amazon account and navigate to the Account & Settings section.
  2. Select Your subscriptions from the top menu.
  3. Find Paramount Plus from the list.
  4. Select Unsubscribe and confirm your decision.

Amazon doesn’t list any different steps for canceling the Paramount Plus free trial through Amazon Prime. After the subscription end date shown on the confirmation screen, you’ll no longer have access to Paramount Plus content and won't be charged further. If you cancel your Amazon Prime membership, all add-on subscriptions will also be canceled.

Does Amazon Prime Offer Refunds for Canceled Subscriptions?

Yes, you can cancel your Amazon Prime membership and get a refund. You might be eligible for a full Amazon Prime membership refund in the following two scenarios:

  1. You canceled your Prime membership within three business days of signing up. However, note that Amazon may charge or withhold from your refund the value of Prime benefits used during this three-day period.
  2. You haven't made any eligible purchases or used any Prime benefits after your last subscription payment.

If approved, your Amazon Prime membership refund will be processed and credited to your original payment method within 3–5 business days. You can track your refund through the Order History page in your Amazon account.

If you signed up for Prime through a third party, such as a mobile operator (e.g., Sprint), you must contact them directly to cancel your membership and request a refund.

A close-up photo of a smartphone displaying the Amazon Prime website
Source: Marques Thomas

Steps To Take if You Run Into Issues During Amazon Prime Cancellation Process

If you encounter issues while canceling your Amazon Prime membership, such as being unable to access the End Membership button or receiving an error message, visit the Amazon Customer Service Page for help.

Alternatively, you can call the Amazon Prime customer service phone number, 1-888-280-4331 (available 24/7), or reach out to Amazon’s customer support team via:

It is necessary to contact Amazon Prime customer service before the current billing cycle ends to avoid being charged for another month or year of Prime membership. The platform’s support team can help you troubleshoot the issue and guide you through the cancellation process if needed. 

You can get help with various issues, including:

  • How to cancel subscriptions on Prime
  • How to delete a Prime membership
  • How to cancel other Amazon subscriptions
  • How to cancel Amazon Prime if you can’t log into your account

Why Canceling a Subscription Service Is Sometimes Difficult

While most cancellation issues are a result of bugs, technical errors, or account-specific problems, some subscription merchants may make the process complicated to retain you as a paying customer. They may employ questionable tactics such as keeping you on hold for extended periods or using manipulative language to guilt-trip you into remaining subscribed. These tactics may prolong the cancellation process, resulting in you paying for another month of the subscription you’re trying to cancel. You may sometimes still be charged even if you complete all the required cancellation steps.

Luckily, there is a way to avoid unwarranted subscription charges, and that is by using virtual cards to sign up for subscription services. These cards mask your real payment card details with random card numbers at checkout. Besides protecting your sensitive information from potential hackers that may breach merchants’ servers, dedicated virtual card providers like Privacy offer advanced card settings that give you control over your spending.

Safeguard Your Online Transactions With Privacy Virtual Cards

A photo of a person browsing an online store on their laptop while holding a credit card
Source: Negative Space

Privacy Virtual Cards offer a range of card controls to help you manage your subscription payments more efficiently. You can link your debit card or bank account to Privacy and create virtual cards that can be used at your favorite online stores and subscription merchants, including Peacock, ESPN+, and HelloFresh.

You can request and generate three types of Privacy Cards, as shown in the table below:

Type of Privacy Card How It Works
Single-Use This card closes shortly after you complete the first transaction. It's ideal for one-time purchases on unfamiliar sites and those you don't plan to use again.
Merchant-Locked This virtual card “locks” to the first merchant you use it at. It's perfect for websites you shop on frequently and for recurring payments, such as bills and subscriptions.
Category-Locked This card “ties” to a specific merchant category rather than a single vendor. It helps you efficiently budget and control spending on categories like digital goods, groceries, or dining. 


Privacy Cards have additional settings that can help you manage subscription payments. You can pause or close the card anytime without affecting your underlying funding source. Privacy will decline all transactions on paused or closed cards, which means the subscription service you want to cancel can’t sneak in any unwanted charges. Note that you still have to contact the merchant directly to cancel your subscription.

You can also set spending limits on your Privacy Cards to stop merchants from charging you more than the agreed amount. Privacy will decline any charges that exceed the preset limit.

Privacy—Security, Convenience, and Control Redefined

As a Privacy user, you get to enjoy additional features that make online transactions fast and seamless, including:

  • Browser extension—Available for Safari, Firefox, Edge, and Chrome, the Privacy Browser Extension auto-populates your virtual card details at checkout, so you don't have to memorize them. The Safari iOS extension also helps iPhone and iPad users enjoy faster checkouts.
  • Mobile app—The Privacy App for iOS and Android lets you create and manage virtual cards on the go and track your account activity in real time.
  • 1Password integration—Privacy’s seamless integration with 1Password allows you to manage your virtual cards and passwords from the password manager’s browser extension.

To get started with Privacy, complete the following steps:

  1. Sign up
  2. Enter the required information to verify your identity
  3. Connect a funding source—a debit card or bank account
  4. Request your Privacy Virtual Card 

Privacy offers four plans to cater to different user needs—Personal, Plus, Pro, and Premium. The Personal plan is free for domestic transactions and includes 12 virtual monthly cards, Merchant-Locked and Single-Use Cards, all card controls, and access to the mobile app and browser extensions. The paid plans, Plus ($5/month), Pro ($10/month), and Premium ($25/month) offer additional benefits, including:

  • Up to 60 virtual cards a month
  • Category-Locked Cards
  • Card sharing
  • Card Notes
  • Fee-free international transactions
  • 1% cashback on specific purchases (up to $4,500 a month)

Privacy Virtual Cards can be used at most merchants and subscription services that accept U.S. Visa® and Mastercard® payments, including FuboTV, Disney Plus, Hulu, Netflix, and Kindle Unlimited

Privacy — Seamless & Secure Online Card Payments
Sign Up